Settings
Configure your business: hours, service area, tax rates, payments, and more.
Settings is where you tell Zoop about your business: your name and logo, where you work, when you're open, and how you get paid. You only need to do this once when you start, and you can come back any time to change something.
Go to Settings in the left navigation menu. A sidebar on the left lists each section — select a section name to open it.
Business info
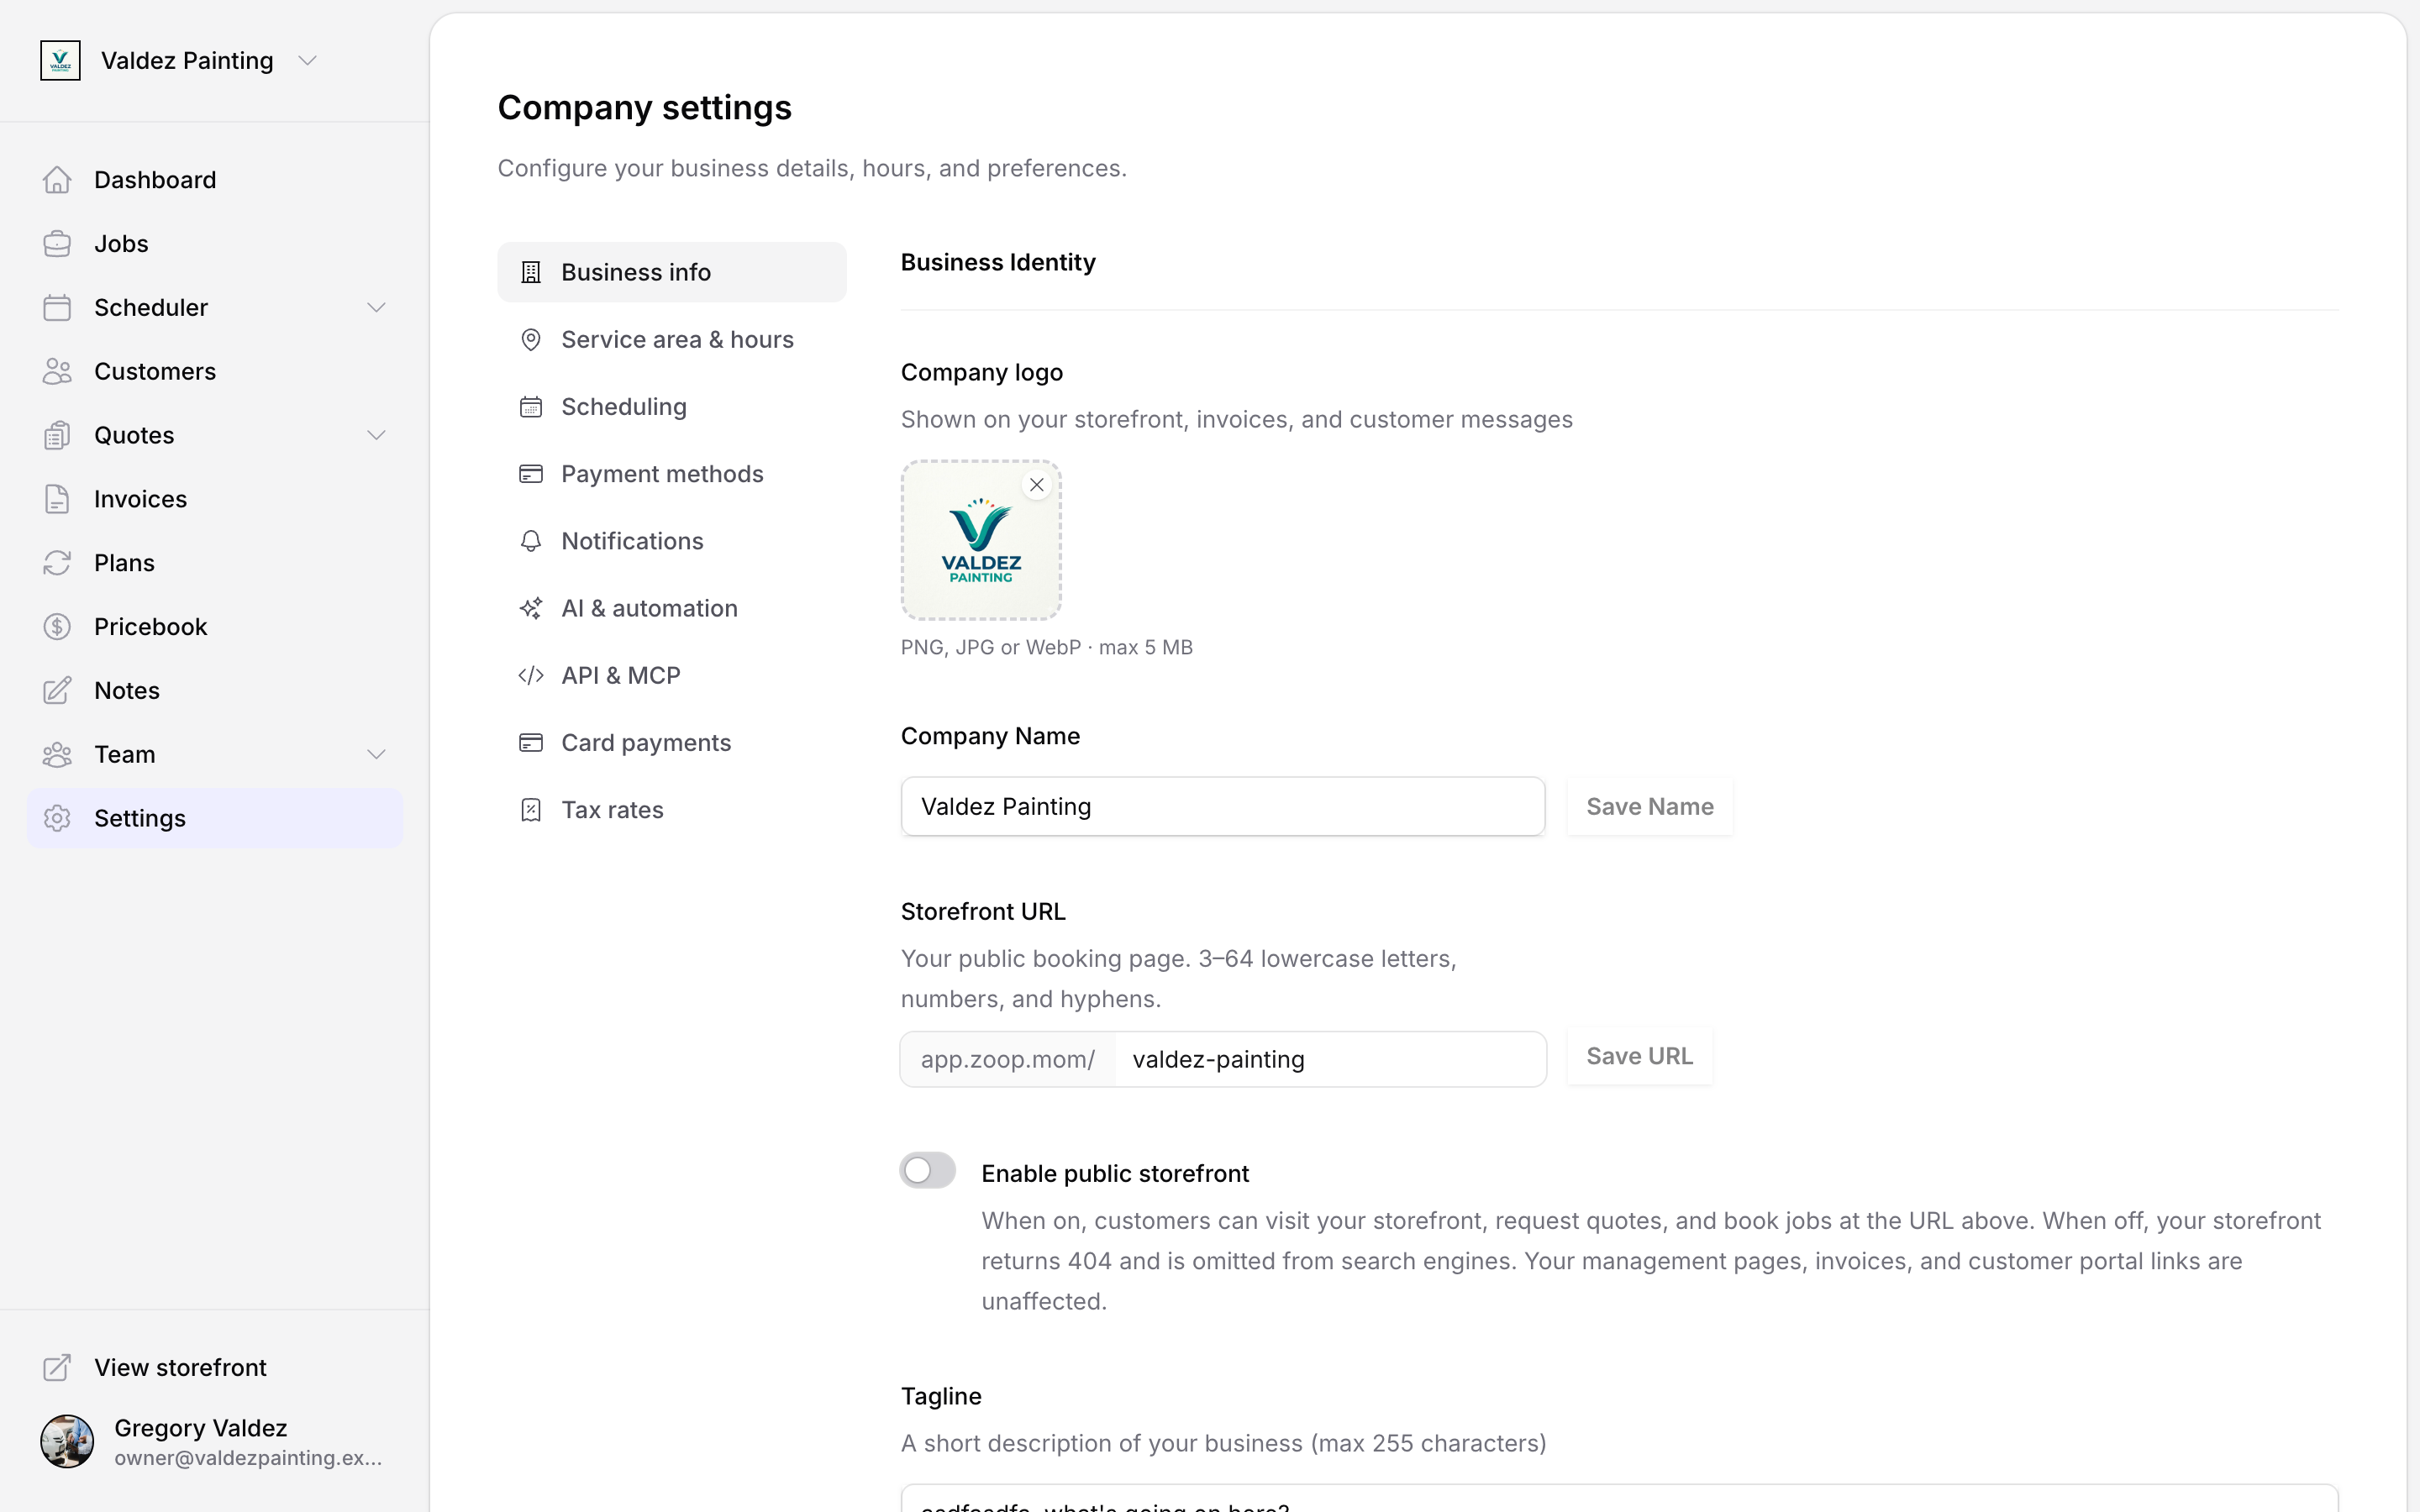
Set your company name, logo, contact details, address, trade types, tagline, and brand color.
Company name — saved independently of the rest of the form. Type a name and select Save name.
Storefront URL — your public booking page address (app.zoop.mom/your-slug). Use lowercase letters, numbers, and hyphens — for example, app.zoop.mom/joes-plumbing. It must be 3–64 characters. Select Save URL after you type it. You must set a URL before you can publish your storefront.
Enable public storefront — toggle this on to make your storefront live. When off, your storefront returns a 404 and is omitted from search engines. Your management pages, invoices, and customer portal links are unaffected.
Logo — shown on your storefront, invoices, and customer messages.
Trade types — check all that apply (Plumbing, HVAC, Electrical, Landscaping, Cleaning, Roofing, General, Garage door, Pest control, Other).
Brand color — used on your customer-facing storefront. Enter a hex value or use the color picker.
Contact information — business phone, email, and website.
Business address — start typing and pick from the autocomplete suggestions, or fill in the fields manually.
Select Save changes to apply.
Service area & hours
Tell Zoop where you work and when you're open.
Service radius — how far you travel from your base location, in miles (1–200).
Service ZIP codes — if you add specific ZIP codes, your storefront will only show your business to customers in those areas (instead of using the radius above). Type a ZIP code and press Enter (or select Add). Remove any by selecting the × on the tag.
Business hours — tap the toggle next to each day to turn it on or off, then set your open and close times. The time picker runs from 6:00 AM to 10:00 PM in 30-minute steps.
Time zone — all your open/close times are in this zone. Customers see "open now" based on your local clock, not theirs.
After-hours message — shown to customers who request service outside business hours (max 500 characters).
Emergency dispatch — when enabled, customers can request after-hours emergency service. You can set a dispatch fee that shows alongside the emergency option.
Select Save changes to apply.
Scheduling
Control how jobs are created and how customers self-book.
Default job duration — the time block Zoop uses when you create a new job (15 min – 4 hr).
Buffer between jobs — travel and prep time automatically added between scheduled jobs (none, 15 min, 30 min, 45 min, or 60 min).
Advance booking window — how far in advance customers can book a job through your storefront (1–365 days). For example, set 30 if you want to accept bookings up to a month out.
Late reschedule cutoff — how close to an appointment customers can reschedule on their own, without calling you. Set to "no cutoff" to let them reschedule any time, or up to 48 hours in advance.
Online booking — enable the booking widget to show a booking button on your storefront. Zoop holds the selected slot until you confirm. You can also set the slot length shown to customers (30 min – 2 hr) and how long a pending slot is reserved before it expires (4–72 hours).
Technician calendar permissions — choose which event types your technicians can add to the calendar: Meeting, Block time, Personal, Other.
Select Save changes to apply.
Payment methods
Choose which payment methods you accept and set up late-payment reminders.
Accepted payment methods — check any that apply:
- Stripe (credit/debit card) — lets customers pay by card online. Requires card payment setup; see Card payments below
- Cash
- Check
- Zelle
- Venmo
- Cash App
- Other
When you enable Zelle, Venmo, Cash App, or Other, extra fields appear for your handle, cashtag, or a custom payment link (e.g. Square or PayPal).
Late payment reminders — automatically send reminders to customers with unpaid invoices. Toggle on 3 days, 7 days, and/or 14 days after due date.
Select Save changes to apply.
Card payments
Connect Stripe to accept credit and debit card payments from customers. Stripe is the payment processor Zoop uses — you'll create a free Stripe account during setup. Funds land in your bank account on Stripe's standard payout schedule (typically 2 business days).
Open card payments
In the settings sidebar, select Card payments.
Start onboarding
Select Set up payments. You'll be taken to Stripe's onboarding flow, which takes about 5 minutes.
Finish on Stripe
Complete Stripe's identity and business verification steps. This is standard for any payment processor — Stripe needs to confirm who you are. When done, you're returned to Zoop automatically.
Check status
Zoop shows a checklist of any remaining requirements. If Stripe still needs something, select Finish on Stripe to resume. Select Refresh status to pull the latest from Stripe at any time.
Once active, the card payments panel shows a green Active badge with your charges and payout status. You can open your Stripe dashboard directly from here or disconnect Stripe if needed.
Offline payment instructions — add a note (up to 4,000 characters) for customers who pay by check, Zelle, or another offline method. This text appears on invoices alongside online-payment options.
Disconnecting Stripe stops new card payments immediately. Your past invoices, completed payouts, and customer records are not affected — nothing is deleted.
Tax rates
Set up the sales-tax rates you charge customers. Adding a rate here means Zoop can apply it to invoices automatically — you won't have to calculate tax by hand. One rate can be marked as the default for new invoices.
Open tax rates
In the settings sidebar, select Tax rates.
Add a rate
Select Add tax rate. Enter a name (e.g. "TX Sales Tax") and a percentage (e.g. 8.25 for 8.25%). Check Default for new invoices if this rate should apply automatically.
Save
Select Save. The rate appears in the active rates table.
You can edit any rate by selecting Edit in its row, or remove it from view by selecting Archive. Archived rates are hidden from the main table — they're not deleted. To bring one back, expand the Archived section at the bottom and select Restore.
To change the default rate, select the radio button in the Default for new invoices column of the rate you want to use.
Editing a rate does not change past invoices. Zoop snapshots the rate name and percentage at the time an invoice is issued.
Notifications
Control which automatic messages Zoop sends to your customers.
SMS notifications — send job confirmations, reminders, and invoice alerts via text message.
Email notifications — send copies of invoices and receipts by email.
Auto-text customers when a job is likely to run late — when a job with a set arrival window looks like it will run late, Zoop automatically texts the customer a heads-up. This is off by default; when it's off, you or your techs send that message manually from Route manager.
Review prompts — automatically ask customers for a review after job completion. When enabled, choose when to send the prompt (1 hour to 48 hours after completion) and add links to your Google, Yelp, and/or Facebook review pages. Review prompts are suppressed automatically for disputed or flagged jobs.
Select Save changes to apply.
AI assistant & automation
AI virtual receptionist — automatically responds to missed calls and texts when you're on a job. When enabled, write an intro message (max 500 characters) that customers receive when the receptionist takes over.
You can also provide a knowledge base the AI uses when answering customer questions:
- Dispatch fee — if set, the AI will quote this when asked
- Services offered — what you can confirm you provide
- Services not offered — what you do not provide
- Service area description — a plain-language coverage description (e.g. "Greater Orlando area within 25 miles of zip 32801")
Maintenance reminders — automatically prompts to schedule follow-up maintenance after equipment installations (such as A/C units or water heaters).
Select Save changes to apply.
API & MCP
This section is for connecting Zoop to other tools and scripts — most users won't need it. If you're not sure what an API key is, you can skip this section.
API keys let you connect Zoop to tools like Zapier, Claude Code, or your own custom scripts. Only account owners can create or revoke keys.
Select Manage API keys to create or revoke keys. See API keys for full setup instructions.
If you're an office manager or technician and need API access, ask your account owner to create a key for you.