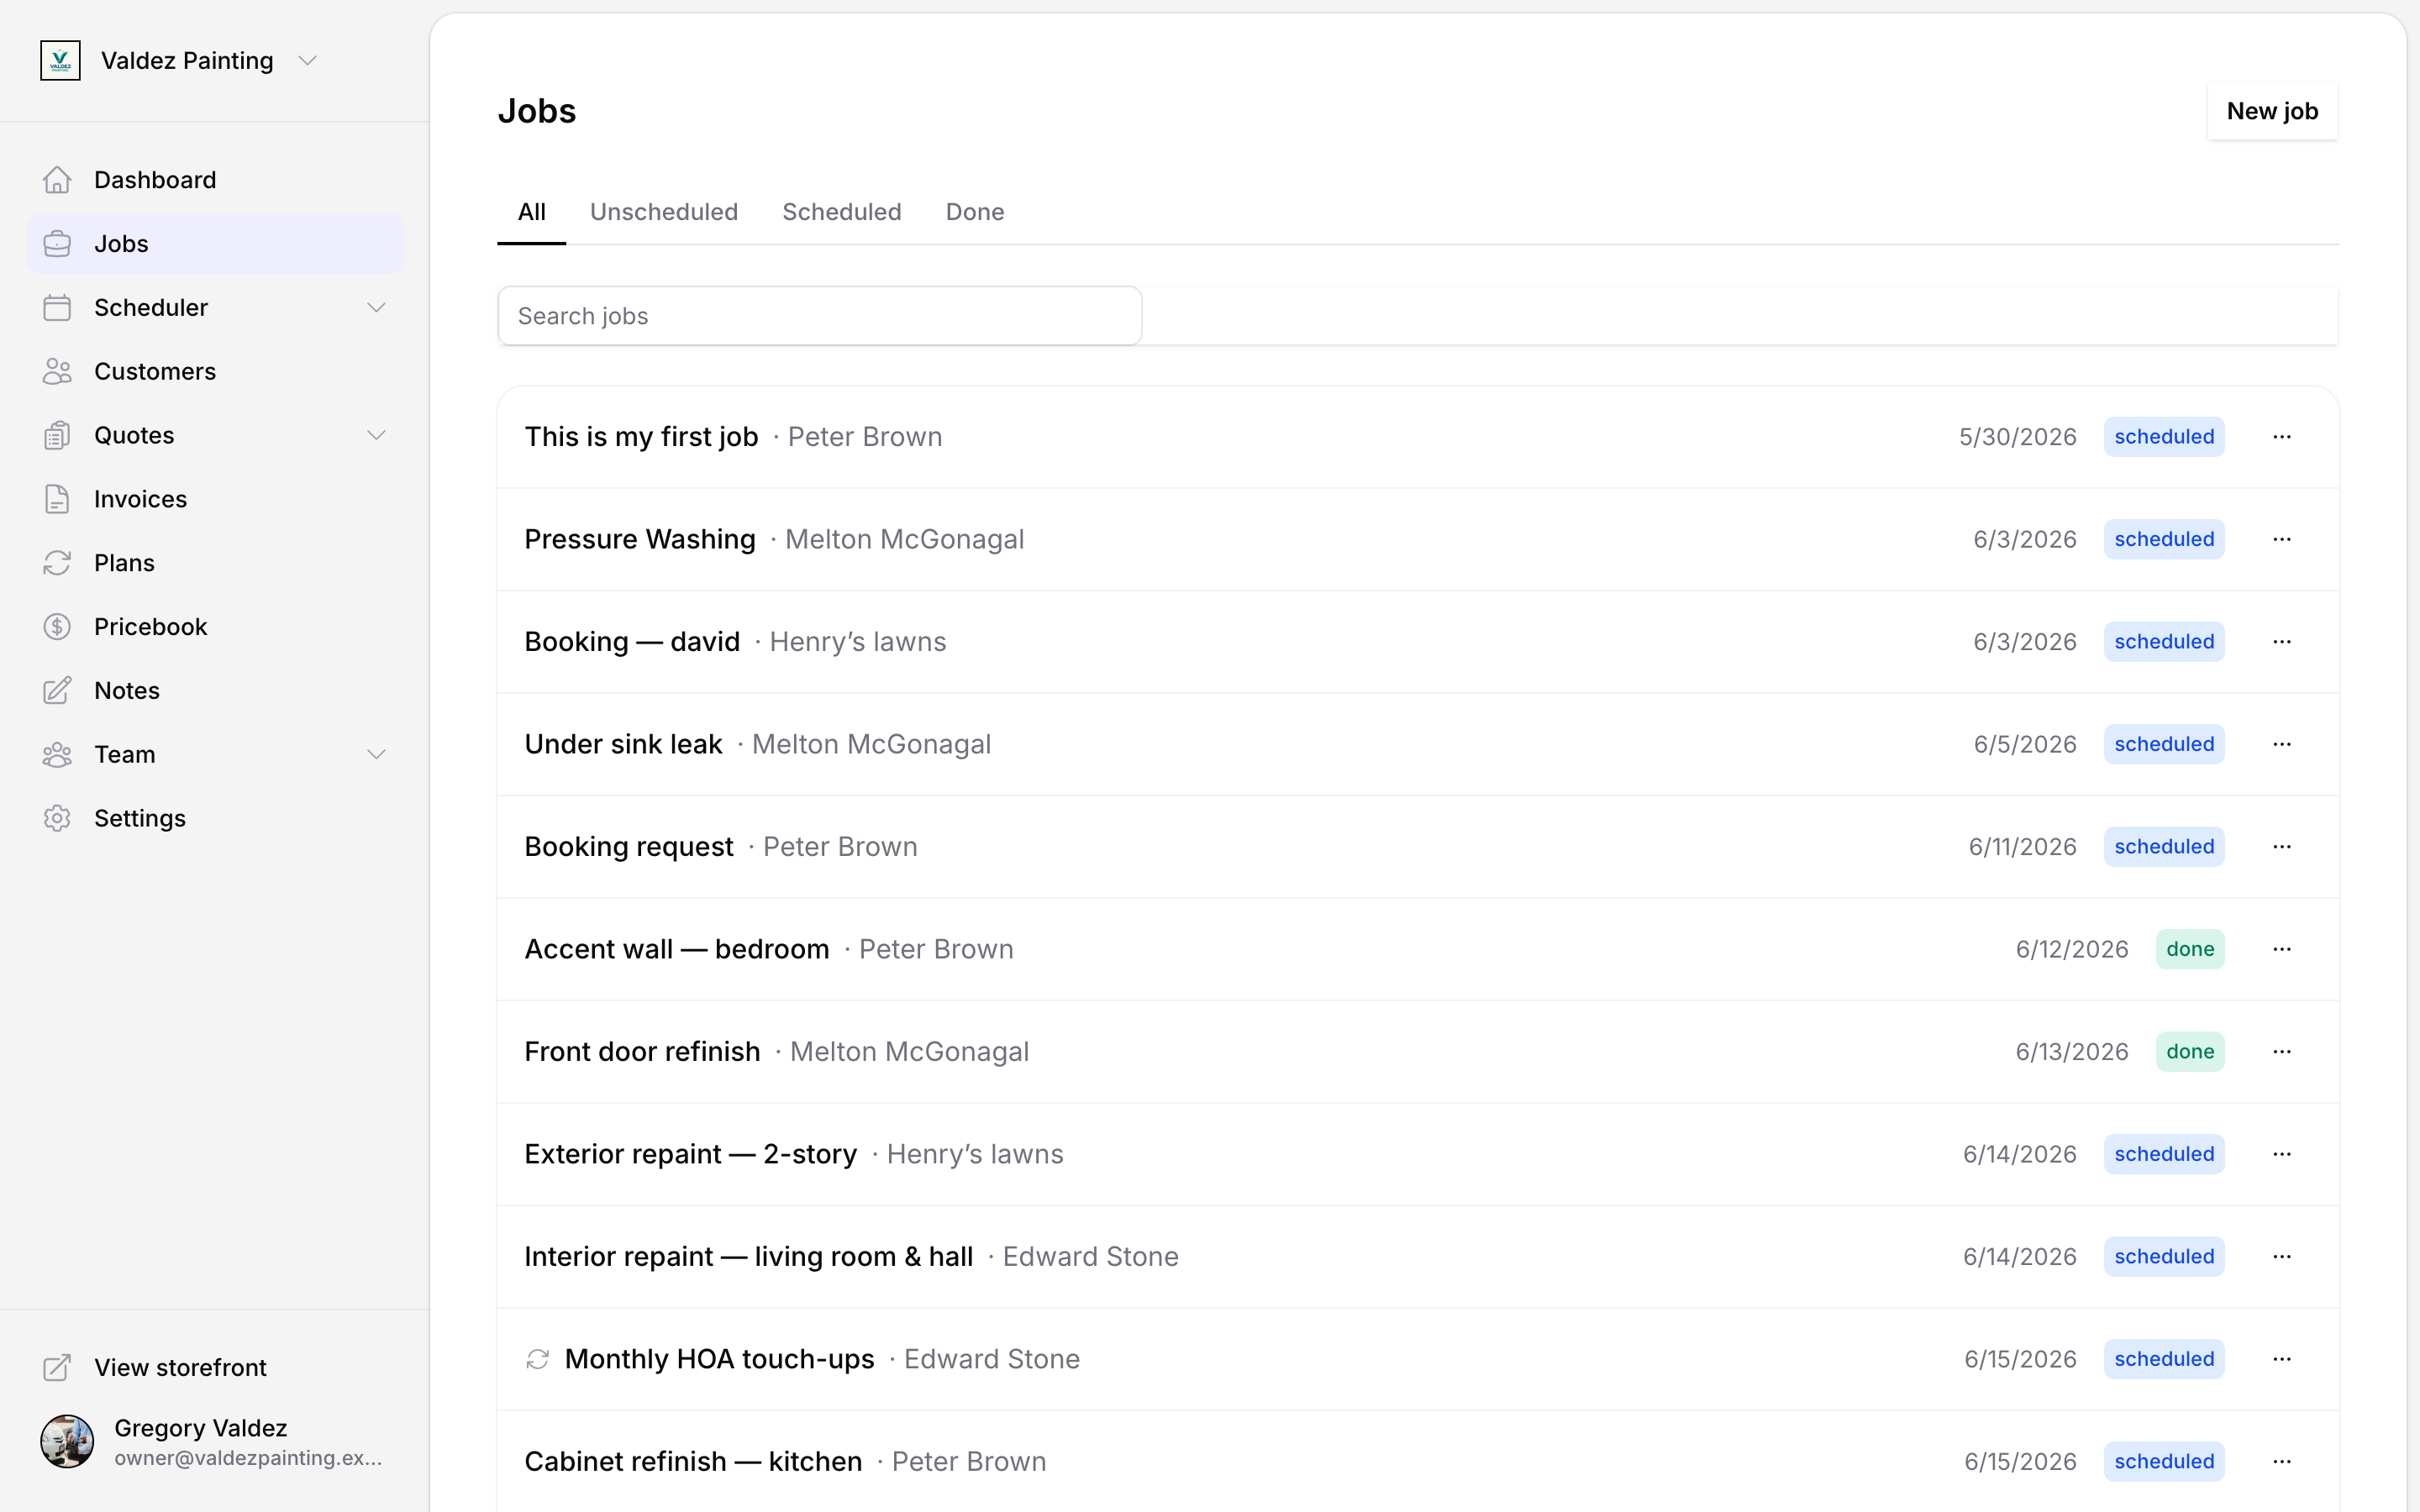
Jobs
Create, schedule, and track work from unscheduled through done.
This is where you track your work. A job represents a single service call — whether it's a one-time visit or part of a recurring series. From here you can assign team members, add what you're charging for, attach photos, and mark the work done when you're finished.
Job statuses
Every job has one of four statuses:
| Status | What it means |
|---|---|
| Unscheduled | Created but no start time set yet. |
| Scheduled | A start time has been set. |
| Done | Work is complete. Tapping "Mark done" moves the job here. |
| Cancelled | Job was called off. |
At the top of the jobs list you'll see tabs: All, Unscheduled, Scheduled, and Done. Tap a tab to filter. You can also search by job title using the search bar.
Create a job
Open the jobs list
Go to Jobs in the sidebar and tap New job.
Fill in the basics
- Title — required. Keep it specific: "Replace water heater" or "Spring lawn treatment" is more useful than "Job 14".
- Customer — search and select the customer. You can leave this blank and add it later.
- Assigned techs — search by name and select one or more team members.
Set the schedule
Choose whether this is a one-time job or a recurring job.
Set a Start and, optionally, an End time. If you leave both blank, the job is created as unscheduled — you can add the time later from the job detail page or from the calendar.
Choose how often the job repeats (daily, weekly, monthly, or yearly), the start date, the timezone, and when the series ends. Zoop creates the series and schedules the upcoming visits automatically. See recurring jobs for full details.
Add line items
Add what you're charging for. Each line item needs a description, quantity, and unit price. As you type a description, Zoop searches your pricebook and suggests matching items — tap one to fill in the description and price automatically.
If you agreed on a single total price for the job instead, enter it in the Flat price field. When you do that, the line-item subtotal still shows but is for your reference only — the flat price is what gets billed.
On any line item you typed by hand, you'll see a "Save to pricebook" link. Tap it to add that item to your catalog so you can reuse it next time.
Add notes
The Notes field is for job-level context: access instructions, gate codes, what the customer told you, what to watch out for. This is separate from the timestamped notes you and teammates can add later on the job detail page.
Save
Tap Create job. Zoop opens the job detail page.
Create a job from a quote
When a quote is accepted, you can convert it to a job directly from the quote detail page. The job inherits the line items and customer from the quote. A "Source quote" link appears in the job's connections panel so you can navigate back.
See quotes for how to send and accept quotes.
Job detail page
The job detail page is where you manage everything about a single job.
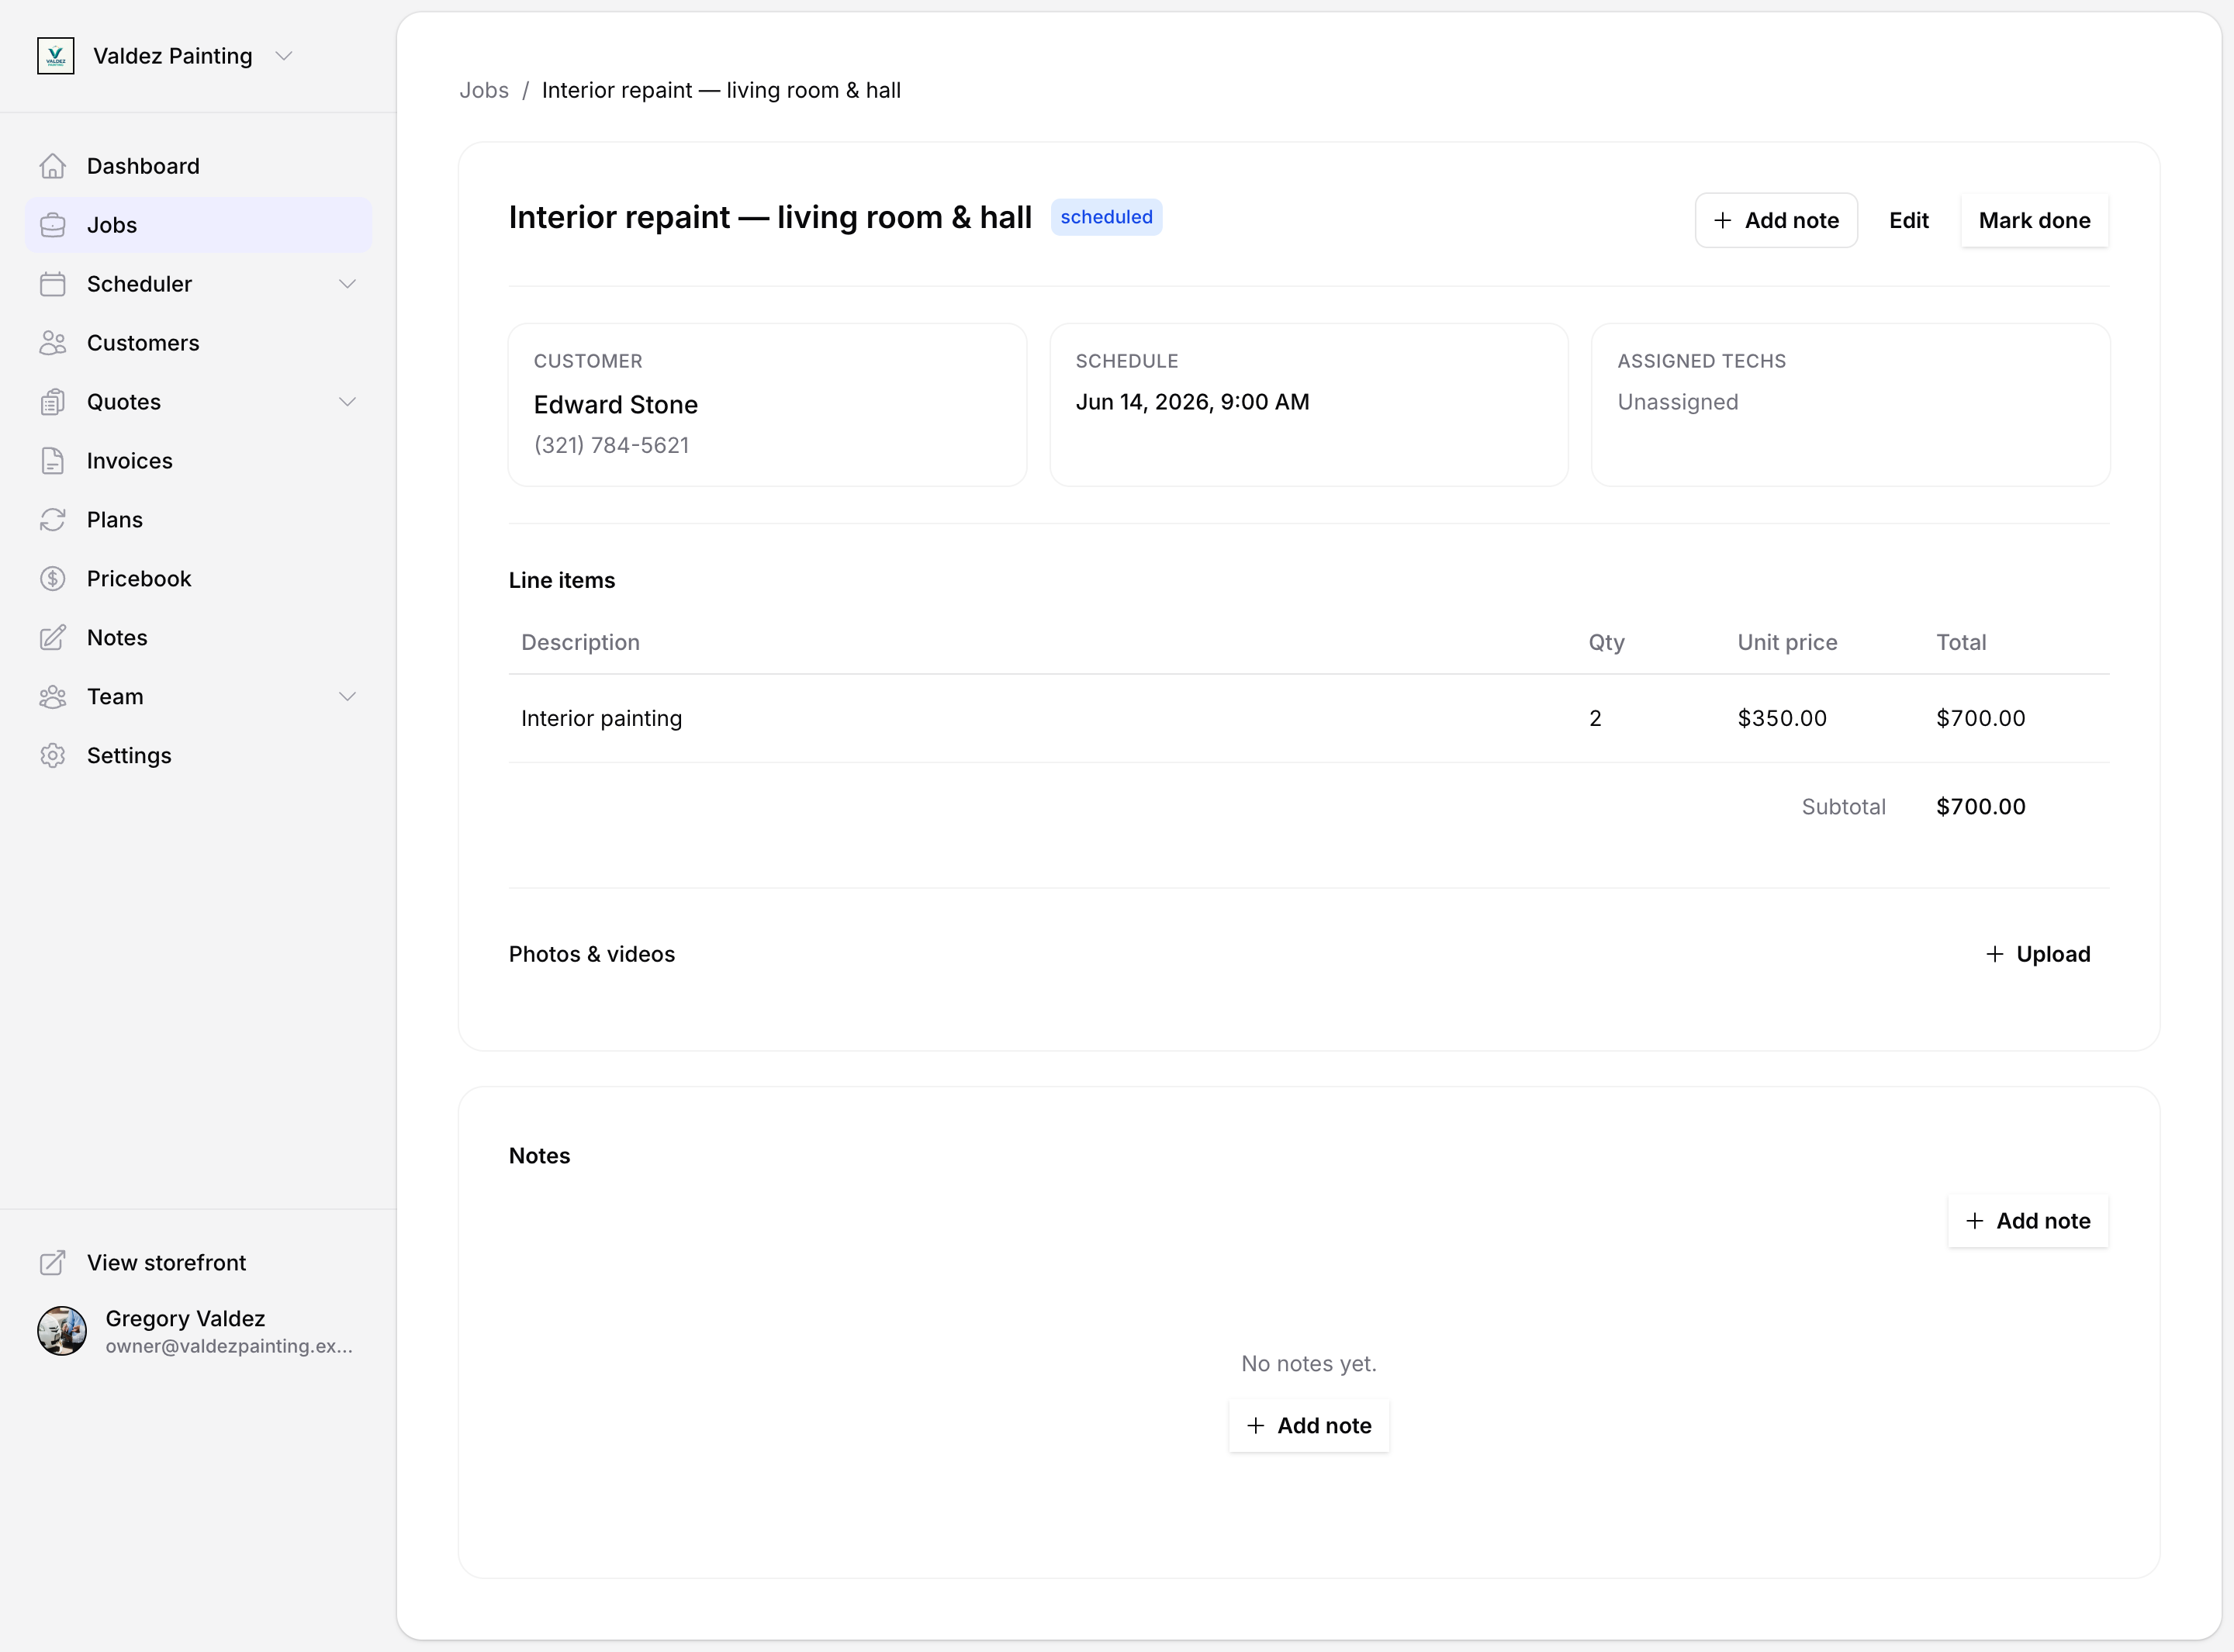
Overview cards
Three cards appear near the top of the page:
- Customer — name, phone, and email. Tap the name to open the customer record.
- Schedule — the start time, end time, and duration for a one-time job. For a recurring instance, this shows the recurrence pattern and a link to the full series.
- Assigned techs — the team members currently assigned to this job.
Line items
The line-items table shows each item with its quantity, unit price, and row total, plus a subtotal at the bottom. If a flat price is set, it appears instead and the table is shown for reference only.
Photos and videos
Tap Upload in the "Photos and videos" section to attach a photo or video from your device. Uploaded media appears in a grid. Tap any thumbnail to open it full-screen; use the left and right arrows (or arrow keys) to navigate between files.
Notes
The notes panel holds timestamped notes for this job — things added by you or a teammate, each stamped with who wrote it and when. Tap Add note in the page header to write one.
The notes field you filled in when creating the job is separate. It appears above the line-items section and is for standing context (access codes, what the customer described), not for conversation back-and-forth.
Connections
If the job came from a quote, a "Connections" panel on the right side of the page shows the source quote and its status. Any invoices you've created for this job also appear here.
Edit a job
Tap Edit at the top of the job detail page. You can change the title, customer, assigned techs, schedule, line items, and notes.
For a recurring job, Zoop asks which visits to update:
| Option | What changes |
|---|---|
| Just this occurrence | Only this date — others are unchanged. |
| This and future occurrences | Splits the series from this date forward. |
| All occurrences | Updates the series template for every occurrence. Past completed jobs are preserved. |
Assign a crew
When editing a job, the "Assigned techs" field also lists your saved crews. Select a crew to add all of its current members to the job at once. If the crew has no members yet, Zoop will let you know and won't assign anyone.
See team for how to create and manage crews.
Mark a job done
Tap Mark done at the top of the job detail page. The status changes to done and the button disappears. You can still edit the job after marking it done if you need to correct anything.
Dispatch and scheduling
Once jobs are on the schedule, two views help you manage the day:
- Dispatch — shows your jobs on a map alongside a schedule board. Use it to route efficiently and assign work to your team.
- Calendar — a time-based view of all scheduled jobs, good for spotting gaps or conflicts.
Recurring jobs
Recurring jobs run on a schedule — weekly maintenance, monthly inspections, and so on. They are managed through a series template that generates individual job occurrences. See recurring jobs for a full guide.