Quotes
Build estimates, send them for approval, and turn them into jobs or invoices.
A quote is an estimate you send to a customer before any work begins. They review it, accept or decline, and then you turn it into a job or invoice. This page walks you through the whole process.
Quote statuses
Every quote has a status that tells you where it stands.
| Status | What it means |
|---|---|
| Draft | Not sent yet. You can still edit everything. |
| Sent | Shared with the customer. Waiting for their response. |
| Accepted | Customer approved it. Ready to convert to a job or invoice. |
| Declined | Customer declined. The quote is kept for your records. |
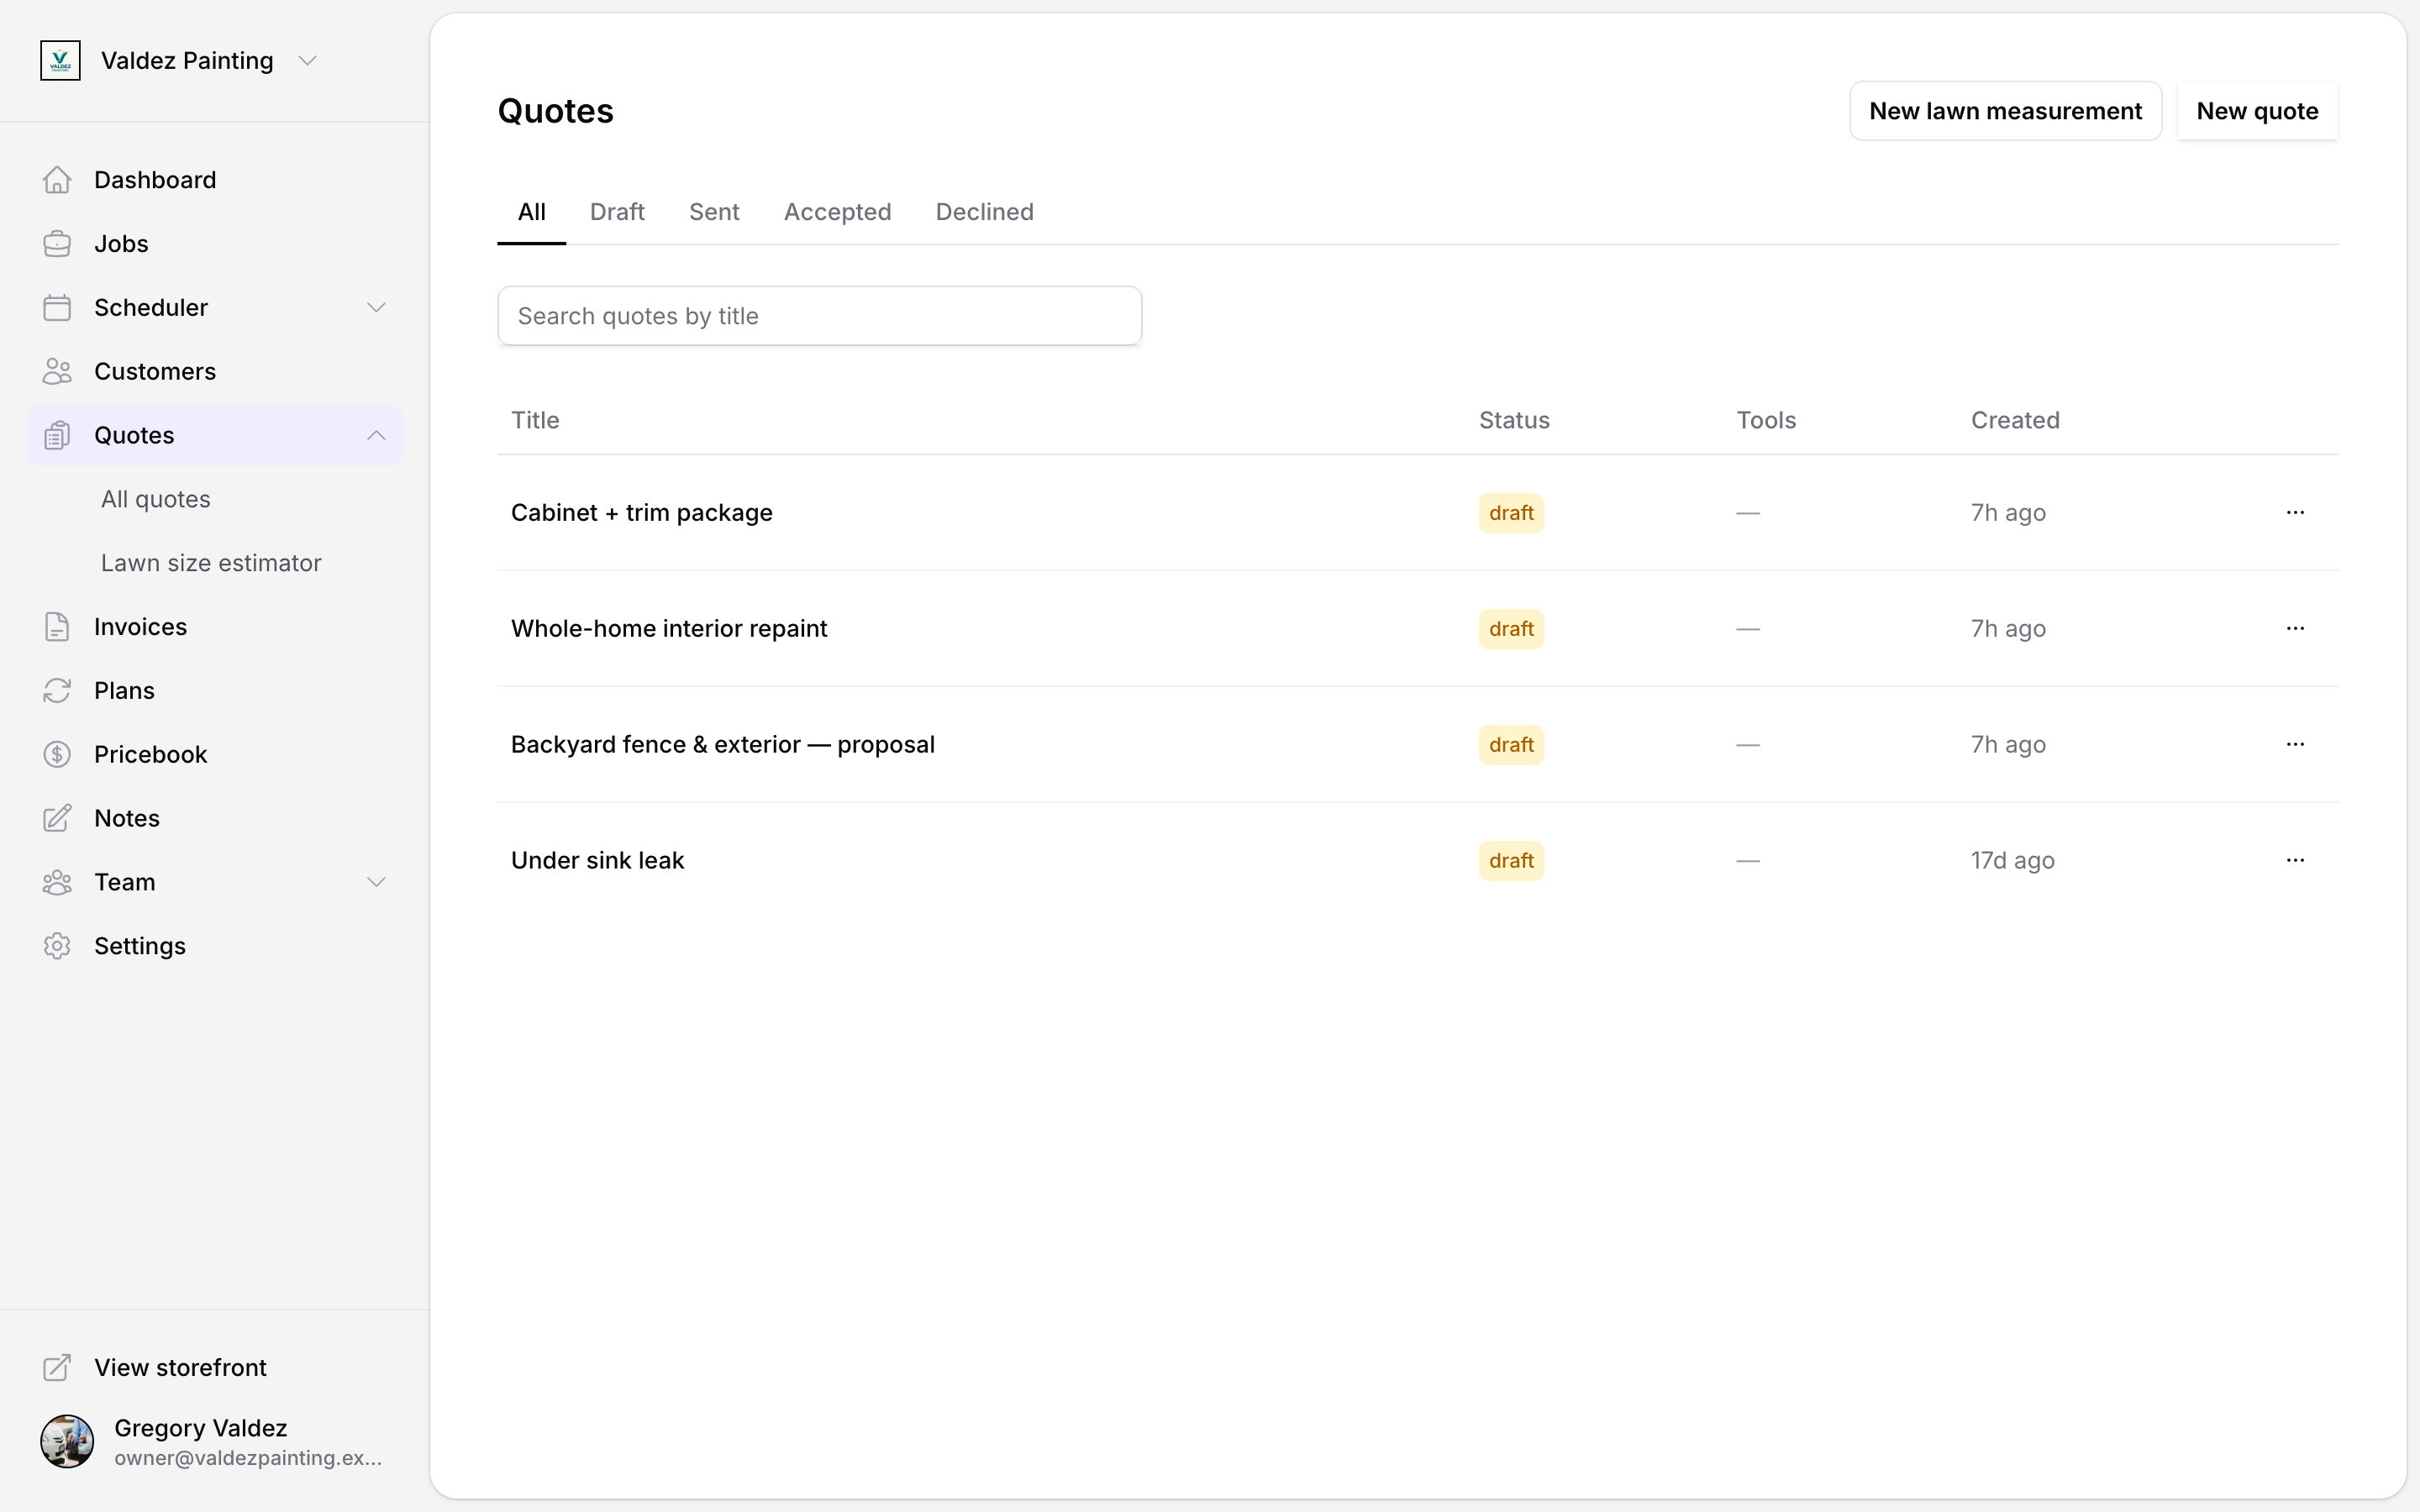
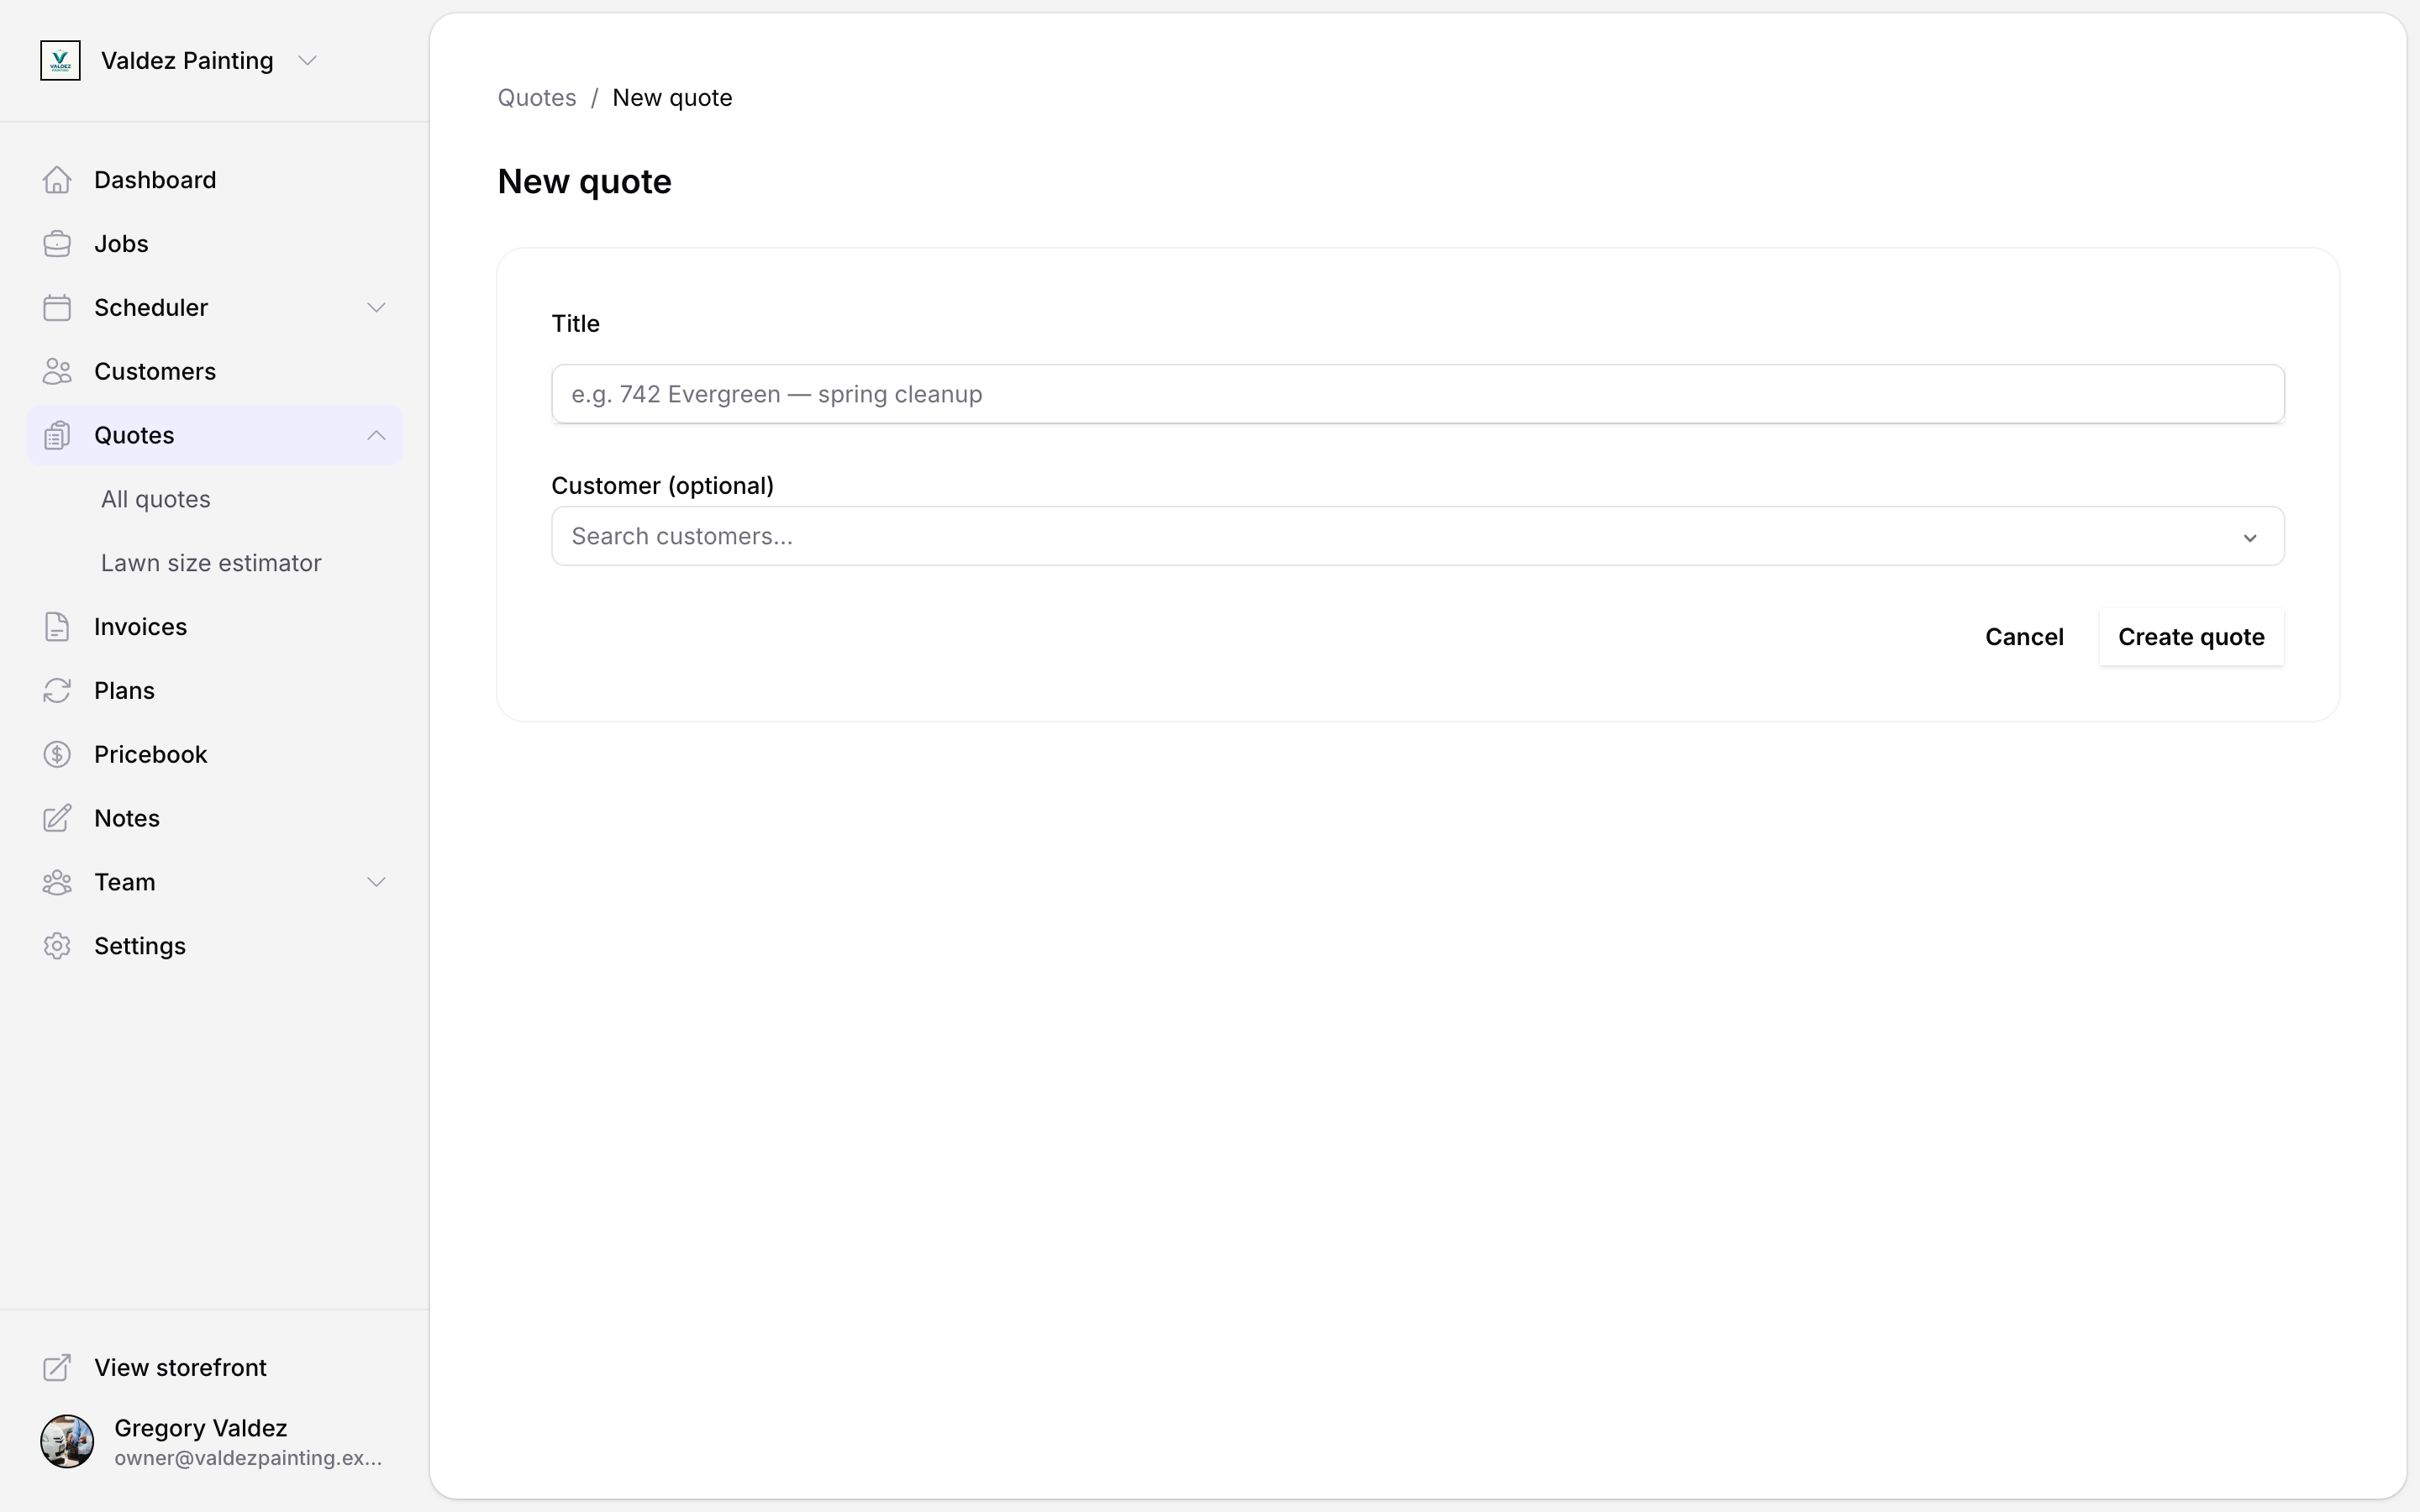
Create a quote
Open Quotes and select New quote
From the sidebar, go to Quotes and select New quote in the top-right corner.
Enter a title
Give the quote a descriptive title — for example, "742 Evergreen — spring cleanup". You can leave the title as "Untitled quote" and rename it later.
Attach a customer (optional)
Use the customer search to link the quote to an existing customer. You can also skip this and assign the customer later from the quote editor.
Select Create quote
Zoop creates the quote in draft status and opens the editor.
Add line items
The line items table inside the quote editor is where you list each service or material and its price.
Select Add line
In the quote editor, select Add line to insert a new row.
Fill in the row
Type a description, then enter the quantity and unit price.
Pull from your pricebook (optional)
Start typing in the description field — if you have catalog items set up, matching ones appear in a dropdown. Select one and the price fills in automatically.
Repeat for each item
Add as many rows as you need for services and materials.
See Pricebook for how to set up catalog items and categories.
Organize with sections (optional)
Sections let you group line items under named areas or stages of work — for example "Front yard" and "Back yard", or "Demo" and "Install". Use them when a job has clearly separate parts you want to show the customer on separate cards.
Add a section
In the Sections area of the editor, select Add section. Zoop creates a card labelled "Section 1".
Rename the section
Select the section label to edit it inline.
Set dates (optional)
Select + Add dates to attach a start and end date to the section. The dates appear as a badge on the section card — useful when you're quoting work across multiple days or visits.
Add line items inside the section
Each section card has its own line items table. Line items added there are pinned to that section.
Reorder sections
Use the up and down arrows in the section header to change the order. Deleting a section moves its line items back to the quote level — they are not lost.
Attach files
You can attach images, PDFs, blueprints, and videos to a quote — either at the quote level or inside a specific section.
- Select Add attachment in the Attachments panel.
- Images open in a lightbox when selected. PDFs, blueprints, and videos open in a new tab.
- To remove a file, hover the thumbnail and select the trash icon.
Use the lawn estimator
If you do landscaping or lawn care, Zoop has a built-in tool that lets you trace the yard on a satellite map and get the square footage automatically. You attach that measurement to the quote so the customer can see exactly what area you're pricing.
Open the lawn estimator
Inside the quote editor, find the Tool inputs panel. Select Add measurement, then choose Lawn measurement.
You can also start from the Quotes list: select New lawn measurement to open the estimator before creating a quote.
Find the property
The map opens in satellite view. Navigate to the property address.
Trace the lawn area
Click once to place each corner around the area you want to measure — imagine you're drawing an outline of the yard. When you're done, click the very first point again (or double-click anywhere) to close the shape.
Made a mistake? Press Backspace while your cursor is inside the map to remove the last point.
Review the area readout
Once the shape is closed, Zoop shows the square footage. Select Edit to drag any corner and fine-tune the shape, or Clear to start over.
Save the measurement
Select Save. The measurement attaches to the quote and appears as a chip in the Tool inputs panel — for example "2,340 sq ft — 742 Evergreen Terrace".
Share with a customer
When the quote is ready, send your customer a link so they can review and accept it. They don't need a Zoop account — the link works in any browser.
Select Share with customer
In the quote editor header, select Share with customer.
Set an expiry (optional)
Choose a date and time for the link to expire. Leave blank for a link that never expires.
Issue new link
Select Issue new link. Zoop generates a share link and shows it once — copy it right away before closing the dialog.
Send the link
Paste the link into a text message or email. Your customer can open it, review the quote, and accept or decline without signing up for anything.
The link is shown only once. If you close the dialog before copying it, you'll need to issue a new link — and the old one will stop working.
Revoke a share link
Need to cancel a link you already sent? Open Share with customer and select Revoke. The link stops working immediately.
Download the PDF
From the quote editor header, select Download PDF. Zoop opens a letter-size proposal PDF in a new tab that you can save or print.
Here's what the PDF includes:
- Your business name and a "Proposal" label at the top
- The quote title, status, and issue date (the date the quote was created)
- Each section as its own card, with its label, description, and date range (if you set one)
- A line-items table under each section showing description, quantity, unit price, and total
- Any line items not assigned to a section grouped under an Other heading
- Attachments listed by filename (not embedded as images)
- A totals card with the subtotal and total
- Your business phone and email in the footer (pulled from your company settings), followed by a "Powered by Zoop" line
Convert to a job
Once a quote is accepted, you can convert it to a job.
Open the accepted quote
The sidebar shows What would you like to do next? when the quote status is Accepted.
Select Create job
Select Create job. A confirmation dialog opens — the quote stays on file as-is.
Confirm
Select Create job in the dialog. Zoop creates the job using the quote's title and opens it.
You can also convert from the Quotes list without opening the quote: select the three-dot icon on the quote row and choose Convert to job. A dialog opens where you can optionally change the job title, assign team members, and choose a schedule (one-time or recurring).
See Jobs for what to do after a job is created.
Convert to an invoice
Want to send a bill without scheduling a job first? You can go straight from an accepted quote to an invoice.
Open the accepted quote
The sidebar shows What would you like to do next? when the quote status is Accepted.
Select Create invoice
Select Create invoice. Zoop creates an invoice pre-filled with the quote's line items and opens it.
Both Create job and Create invoice require at least one line item on the quote. Add line items first if the buttons are disabled.
See Invoices for how to send the invoice and record payment.
Archive a quote
Archiving removes a quote from every tab in the Quotes list — All, Draft, Sent, Accepted, and Declined — without permanently deleting it. The quote's history is preserved.
There is no archive button in the Quotes UI right now. The row actions menu (the three-dot icon on a quote row) shows Open quote, Open in lawn editor, and Convert to job — but no archive option. The quote editor doesn't have one either.
Archiving is currently only available through the API, and only the account owner can do it. There is no Archived tab, so once a quote is archived it won't appear anywhere in Zoop.